1. What is the Email block widget?
The Send Email block widget allows the operator to send information to one of their colleagues.
Its purpose is to facilitate data transition, enabling an operator to speed up the reporting process to their supervisor or colleagues.
The Send Email block widget is found in the Workflows category of your editing studio.
The difference compared to the Finish and Send block widget is that once the "Send Email" task is validated, the intervention is not automatically concluded.

2. How to configure it?
Here are different examples for configuration:
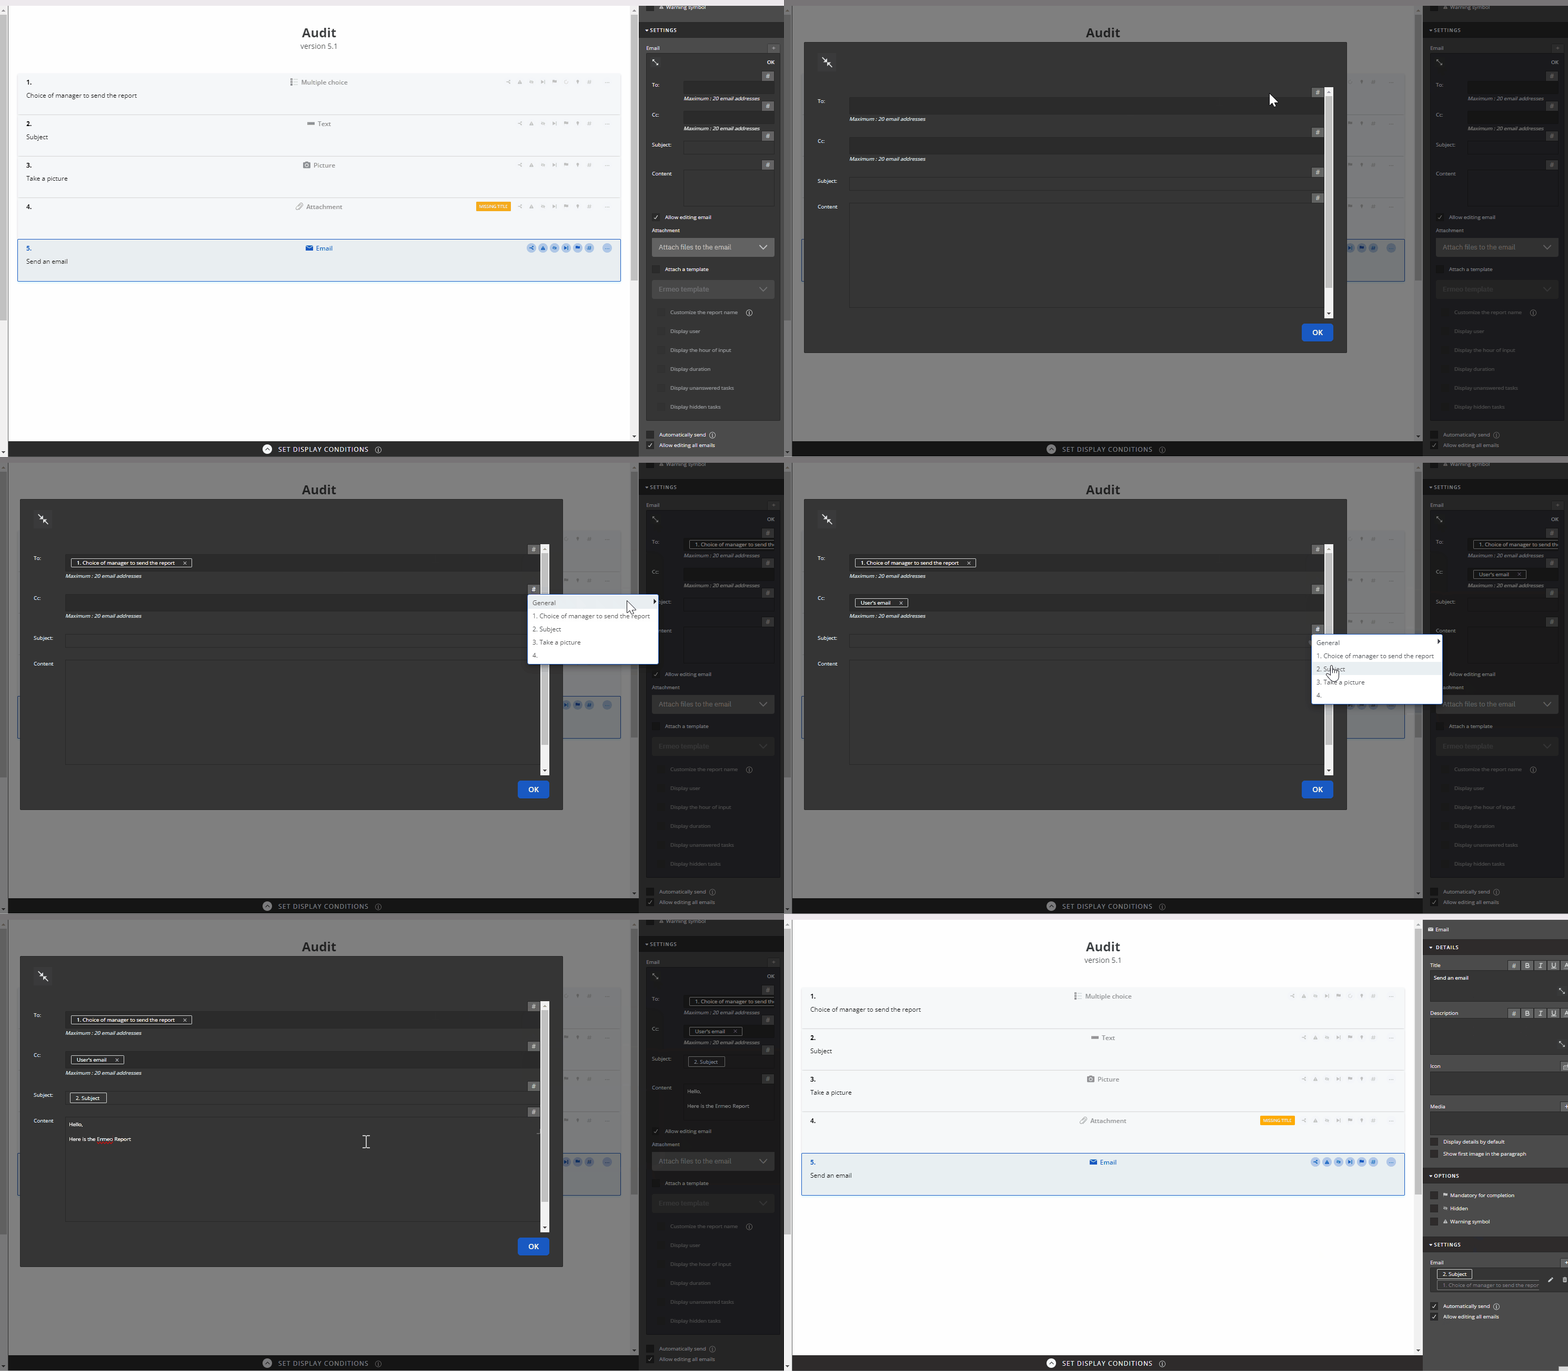
- Define the recipient list, subject, and email body
To set the recipient list, simply enter the email address(es) of the recipient(s). Email addresses should be separated by a semicolon (";"). For recipients who should be in blind carbon copy, use the CC field.
To define the subject and email body, fill in the "Subject" and "Message" fields.
- Use tags to personalize emails
You can use tags in the subject and email body to personalize the email based on the intervention specifics.
- Allow or disallow user email modification
You can allow or disallow the operator from modifying the email. If the "Allow modification" option is not checked, the user will not be able to modify the recipient list, subject, or email body.
- Automatically send the email once a task is validated
You can enable automatic sending of the email once the task is validated.
3. How does the Send Email block widget work in practice?
3.1. Context
In the middle of an intervention, an operator sends an email to their supervisor to inform them that they have reached a specific stage of their intervention.
How to ensure that an email is sent automatically in the middle of each intervention? How to configure the content of this email?
- In the editing studio, drag and drop the Send Email block widget into your "Engine Maintenance Record" form, between the Readings and Engine Inspection sections.
We will configure the block widget to perform the following actions:
- The recipient of the intervention will be the operator's supervisor (value retrieved by tag).
- The email CC will be help.desk@causeway.com.
- The subject will be a text field retrieved using a tag.
- The message will be a generic message modifiable by the user.
- The email will be sent automatically.
- In the settings, copy and paste the tag corresponding to the supervisor's name into box "To".
- Write support@ermeo.com in the "Cc" box.
- Copy and paste the tag corresponding to the subject name into the "Subject" box.
- In the message field, write the following text: "Hello, I am currently halfway through my intervention. Field Operator"
- Enable modification for the operator.
- Enable automatic sending.
When used in the application, after validating this task, the operator can continue their intervention.

3.2. Attach photos as attachments:
With Ermeo, you can attach files and photos as attachments to your Ermeo report.
The email recipient will receive your email including the photos from the photo blocks you selected during the email block widget setup.

3.3. Send a custom report during the intervention
Now, with Ermeo, you can send reports during interventions. To do this, you need to enable the "Attach a report" option. This option allows you to choose a custom report (or the standard Ermeo report). The custom report can be converted to PDF before being sent.
3.4. Send different emails to different recipients for the same intervention
You can send different emails to different recipients from the same intervention.
To set up multiple email sends, simply use the small "+" button:
- The entered email addresses must be valid. If the email address is not valid, the email will not be sent.
- The attachment name (thus the report) sent by email follows this format: YYYY_MM_DD HH:MM FormName