1. How to Facilitate Anomaly Management?
The use of paper forms presents an obstacle to anomaly management. The Ermeo tool allows you to easily record these anomalies and track them until they are resolved. Ermeo automates the formatting of these anomalies to facilitate the visualization and tracking of data on BI tools. Our tool will enable you to manage these anomalies in databases while allowing your operators to create or modify these anomalies from the field.
2. What is Anomaly Management?
An anomaly is a singularity most often linked to a resource using a parent-child relationship.
This anomaly can be a defect in equipment, a broken tool, or a comment reporting a failure or any form of non-compliance.
The goal is to quickly report these anomalies and track them over time to decide on corrective actions.
3. How to Implement Anomaly Tracking on Ermeo?
In this article, we will only look at the method to enable the management and tracking of these anomalies.
The main steps for creating anomalies were as follows:
- Have an existing database listing one or more types of equipment.
- Create an Anomalies database to record all reported anomalies.
- Create a form to recall anomalies from the field to modify them.
Context: Below, we will see the steps to follow and resolve anomalies for an operator performing building maintenance. The inspected buildings contain fire extinguishers, fire alarm trigger boxes, and BAES (Autonomous Emergency Lighting Units). Anomalies have already been reported on these pieces of equipment. Maintenance operators will need to correct these anomalies and report the corrections to their administrators.
To do this, the steps are as follows:
- Modify the Anomalies database to add a "Corrective" Status.
- Create a form to recall existing anomalies in the application, based on the resource chosen at the start of the intervention.
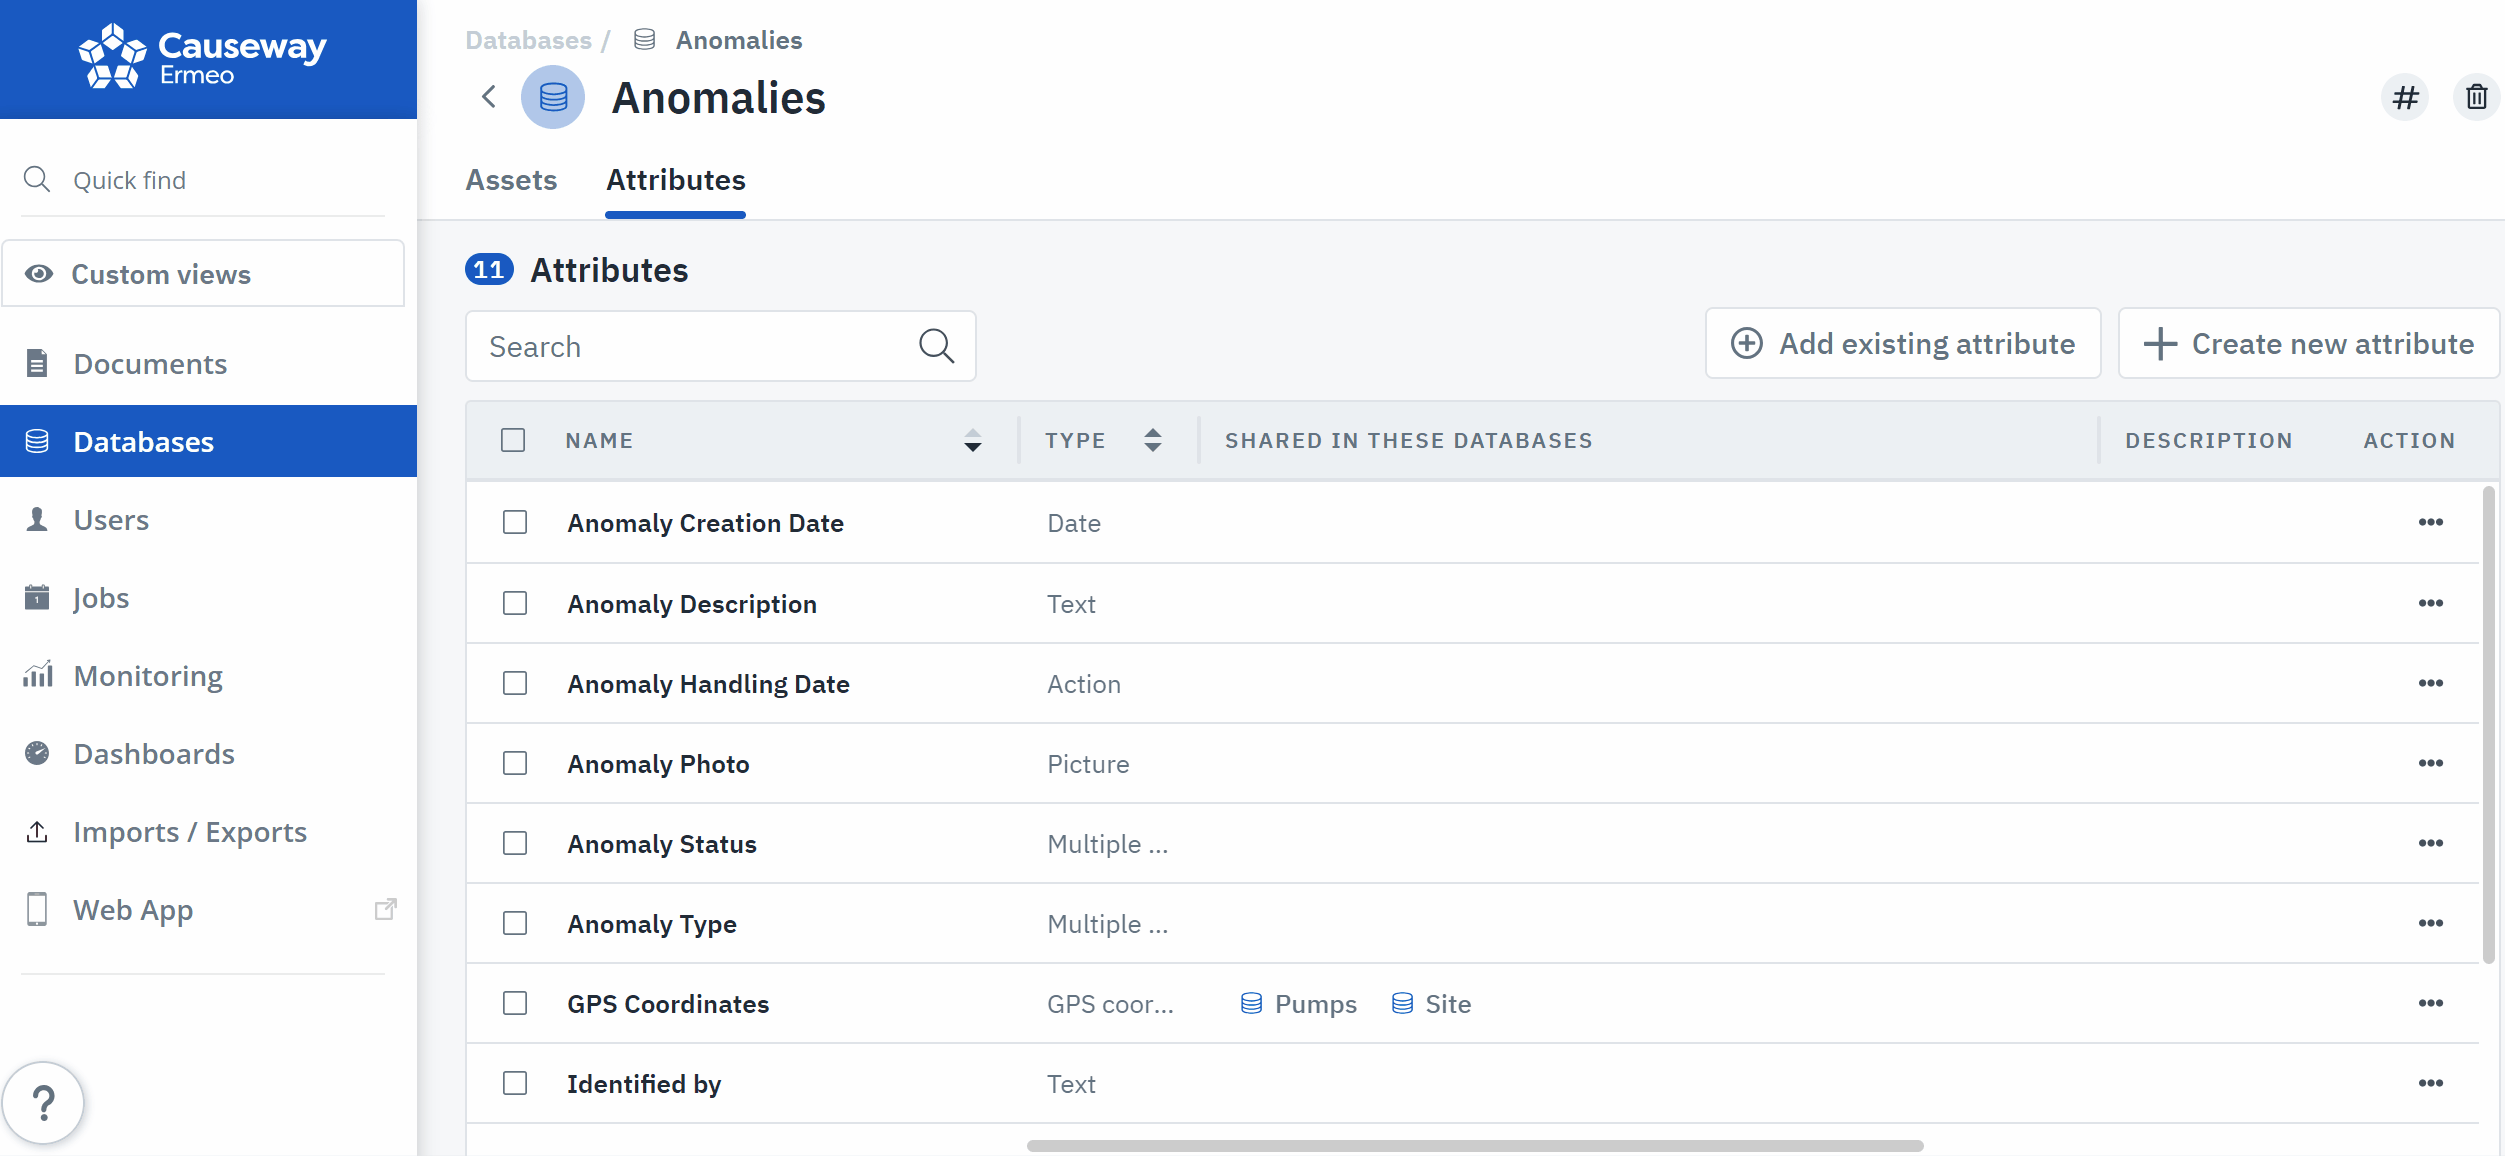
Previously, we created an Anomalies database. An anomaly was then described by:
- Anomaly Creation Date (Date)
- Anomaly Description (Long Text)
- Anomaly Status (Multiple Choice)
- Anomaly Photo (Photo)
- Criticality (Multiple Choice)
All these data are attributes.
We will add a Corrective status (Text type). If the operator in the field resolves the anomaly, they can describe the corrective action taken. The description of this corrective action will then be retrieved in the Anomalies database.
Step 1. Modify the Anomalies database to add a "Corrective" Status
Here are the sub-steps:
- Click on the Databases menu on the platform and enter your "Anomalies" Database (this database may be named differently depending on your use case).
- Click on the "Attributes" tab then on "Create a new attribute."
- Enter the word "Corrective" in the Name field. Choose the "Text" type and activate the "Long Text" option.
- Validate the creation by clicking on "Create the attribute."
Step 2: Create a form to recall existing anomalies
In this step, we will create a form to allow an operator to recall anomalies from the field.
At the start of the intervention, the operator will choose a resource on which potential anomalies might be found. This is called the primary resource of the intervention.
It is noted that anomalies are, in fact, child resources of an inspected resource. In our case, by choosing a resource at the start of the intervention (also called the primary resource), the operator will then call all child resources of this primary resource. They will then call all anomalies of this primary resource.

In the form, you can choose what can be updated or not by the operator in the field. If the person handling the anomaly is different from the person reporting the anomaly, you can condition the display of certain sections to show only the essentials during your interventions.
Here are all the sub-steps to create the form to recall existing sub-anomalies:
- Click on the Documents tab and click on New Document.
- Name your document "Anomaly Tracking" and choose the document type "Form."
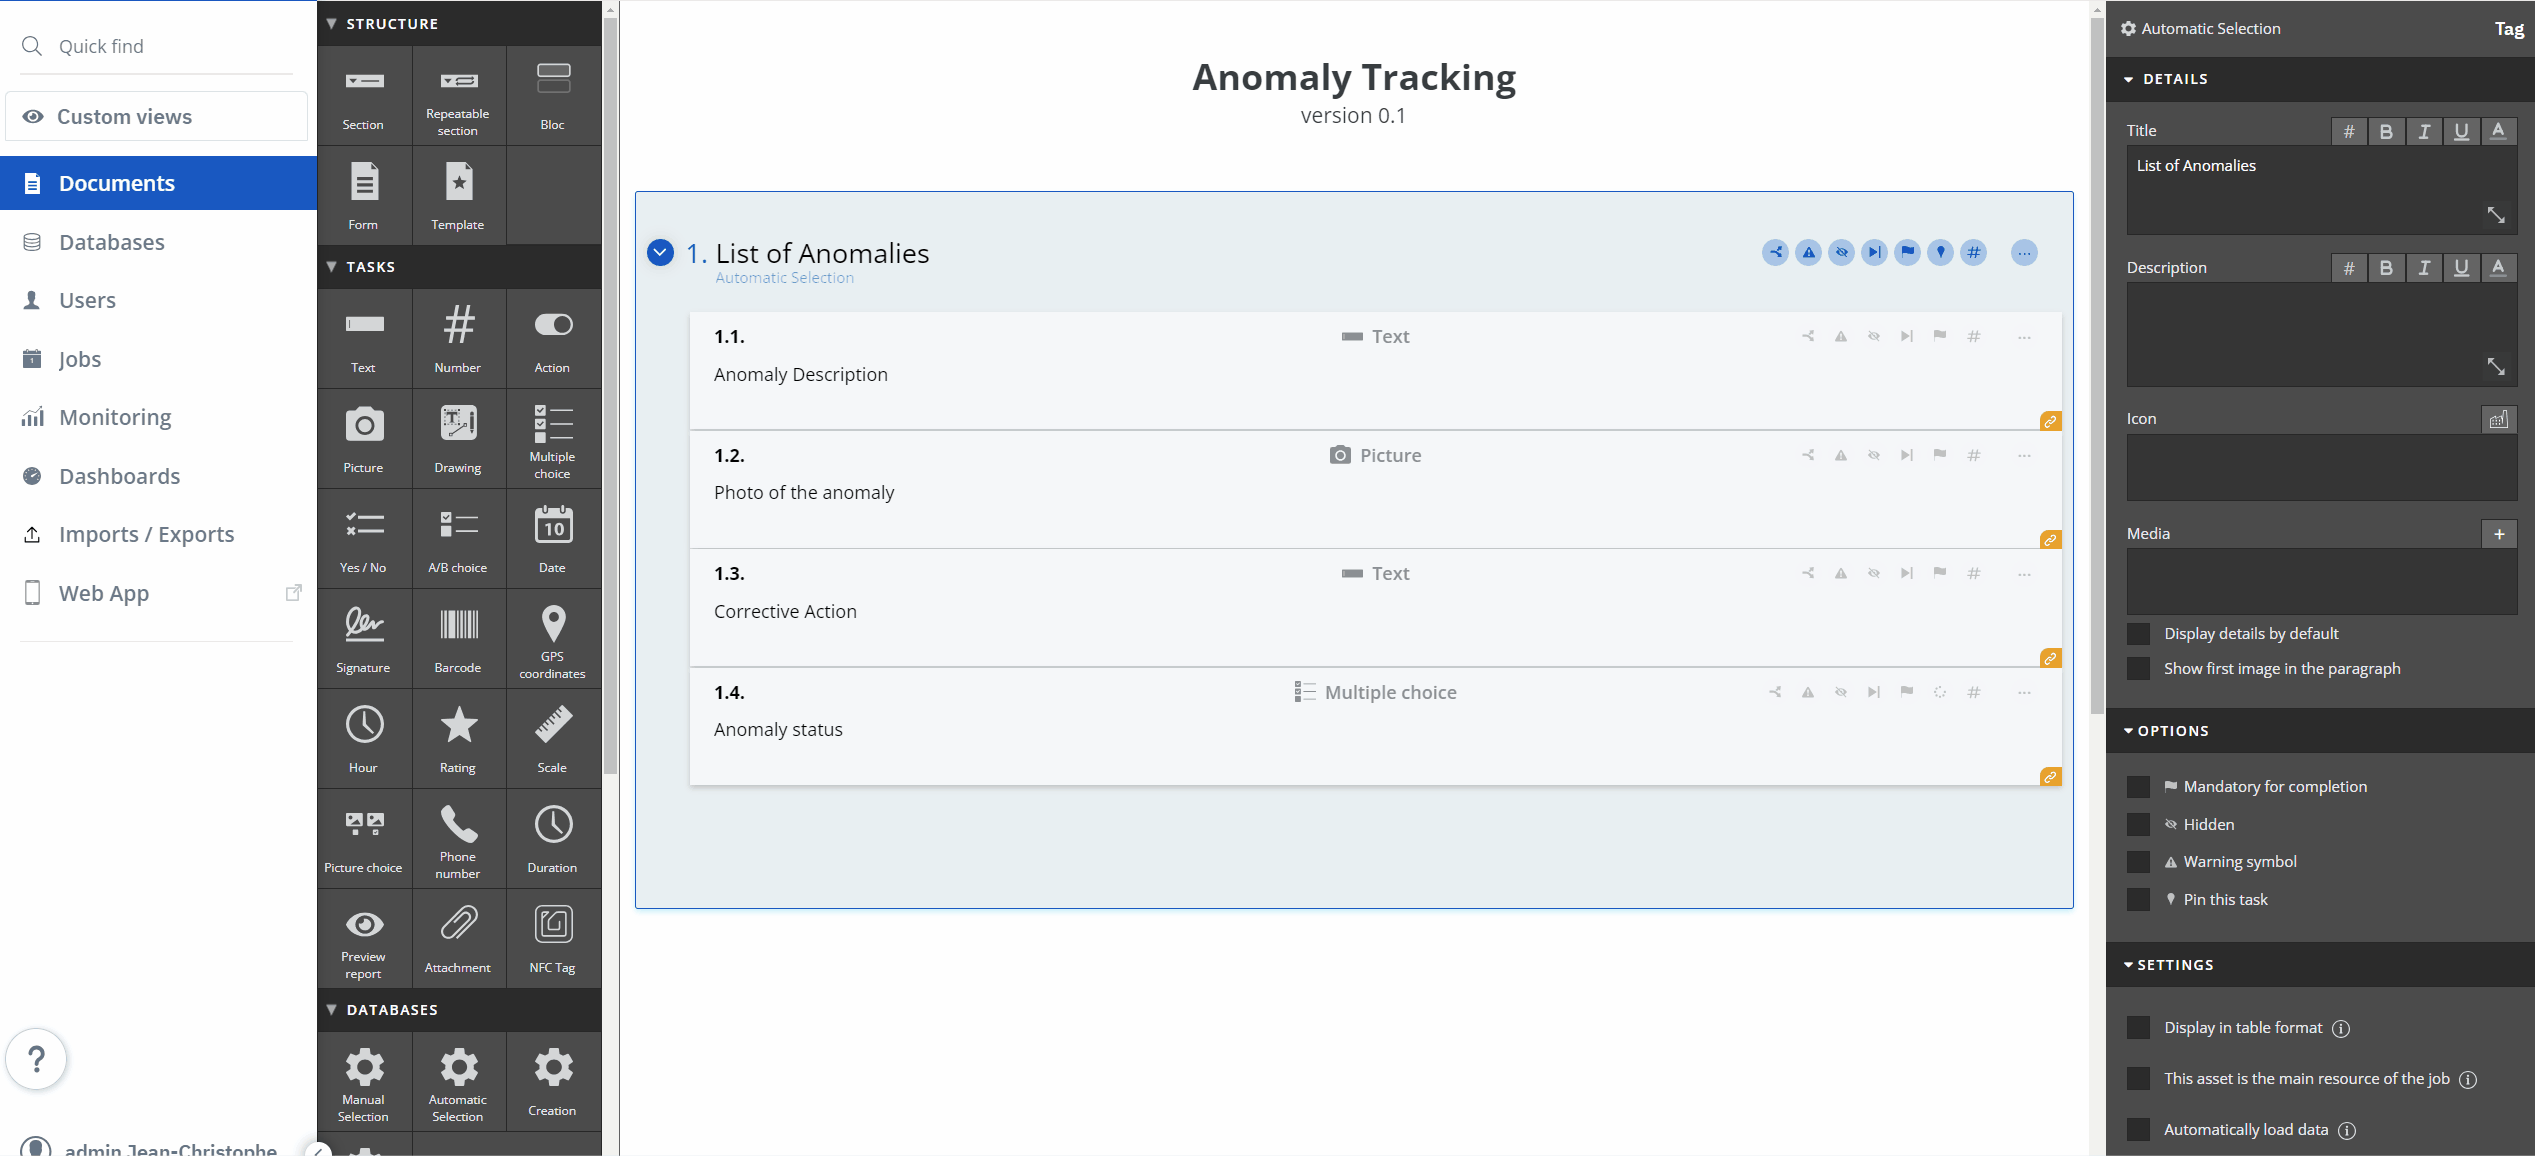
- Click on "Open in studio" then drag and drop an Automatic Selection section. Name this section "List of existing anomalies."
- Within the Automatic Selection section, drag and drop a Text section. Name it "Anomaly description" and link this section with the "Anomaly Description" attribute.
- Within the Automatic Selection section, drag and drop a Photo section. Name it "Anomaly photo" and link this section with the "Anomaly Photo" attribute.
- Within the Automatic Selection section, drag and drop a Text section. Name it "Corrective action taken to resolve the anomaly" and link this section with the "Corrective" attribute created previously.
- Still within the Automatic Selection section, drag and drop a Multiple Choice section. Name it "Anomaly status" and link this section with the "Anomaly Status" attribute.
4.1 Still in the section settings, click on Or paste the tag and enter the following tag ##asset_name##. Thus, only anomalies of the resource chosen at the start of the intervention will be displayed.
4.2 In the section settings, choose the Anomalies value in the "Database" filter. You can choose another database name if your Anomalies database is named differently.
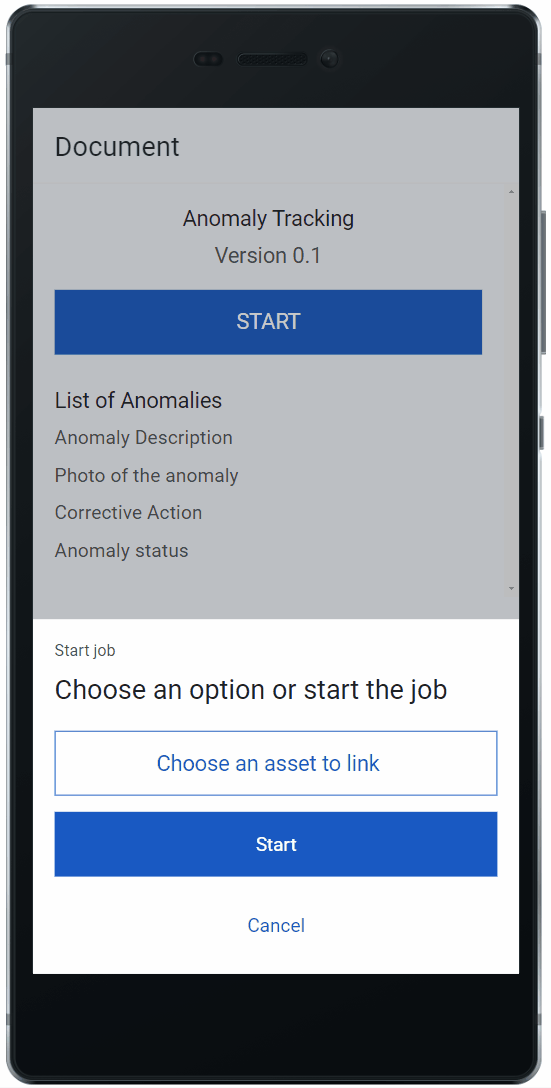
- Exit the form then publish it.
- You can launch the form from the web app or the mobile application.
- Choose the resource on which you have anomalies. Review the anomaly and enter the corrective action taken, as well as the new anomaly status.
- Complete the intervention and return to the web platform. The resolved anomaly is now visible with its corrective action in your Anomalies database!
